
Fine-tune actuation points for your perfect typing and gaming feel
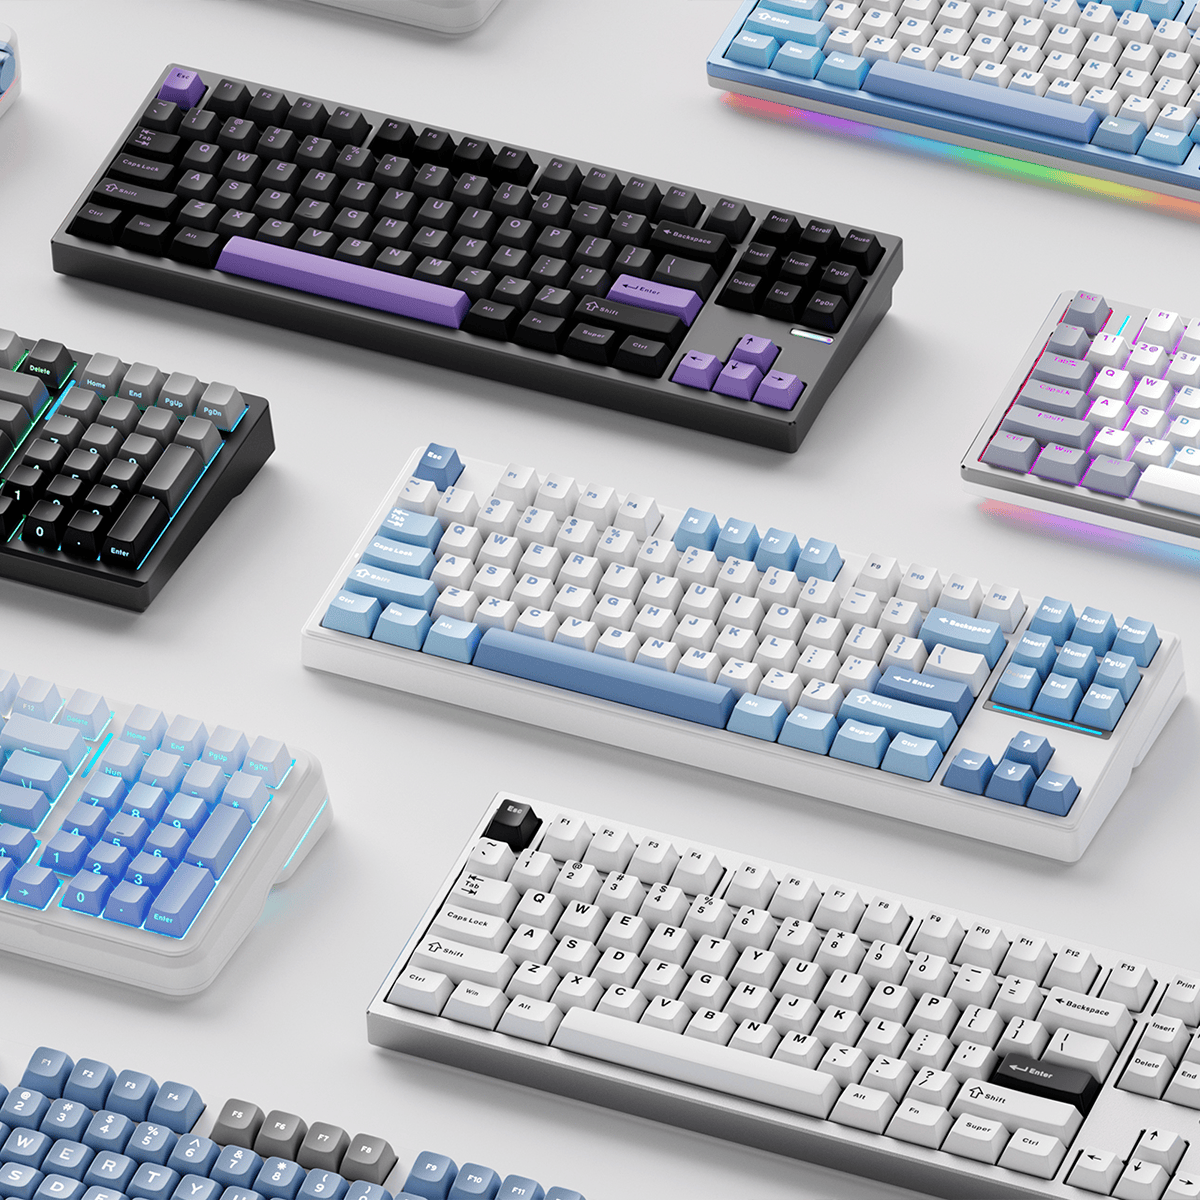
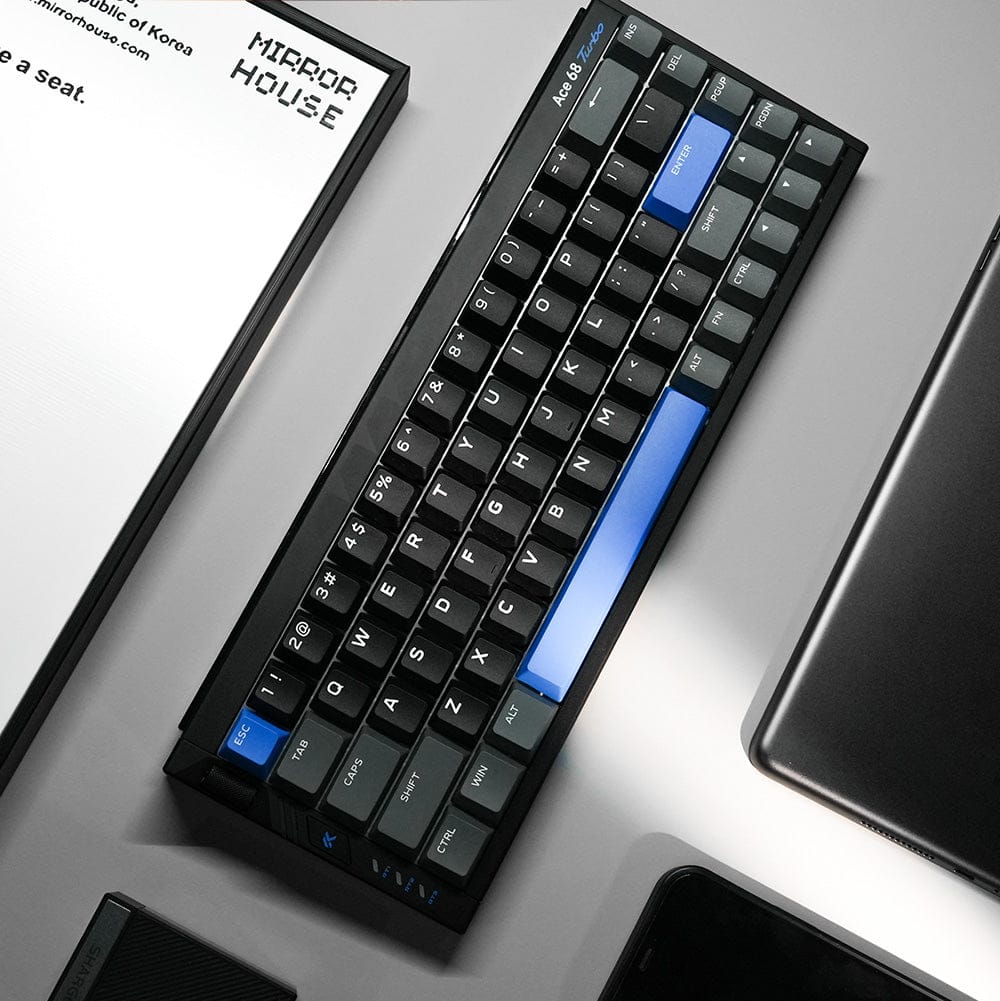
This guide will help you get started with key features, advanced settings, and customization tips for the MCHOSE Hall Effect (HE) magnetic switch keyboards, including Ace 60/68/68 Air and Jet 75 series.
For further questions, feel free to contact our support team at support@mchose.store, or join our Discord community to connect with other users and get real-time help.
M Hub Link: https://www.mchose.store/pages/firmware-2
1. Trigger Settings
Actuation Point Adjustment
Standard actuation range (0.1mm – 3.4mm)
Rapid Trigger (RT) supports 0.005mm to 3.4mm
If your RT settings are ≤ 0.04mm ultra-low actuation, you’ll need to enable “Berserk Mode” (on the Performance setting) to improve trigger reliability.
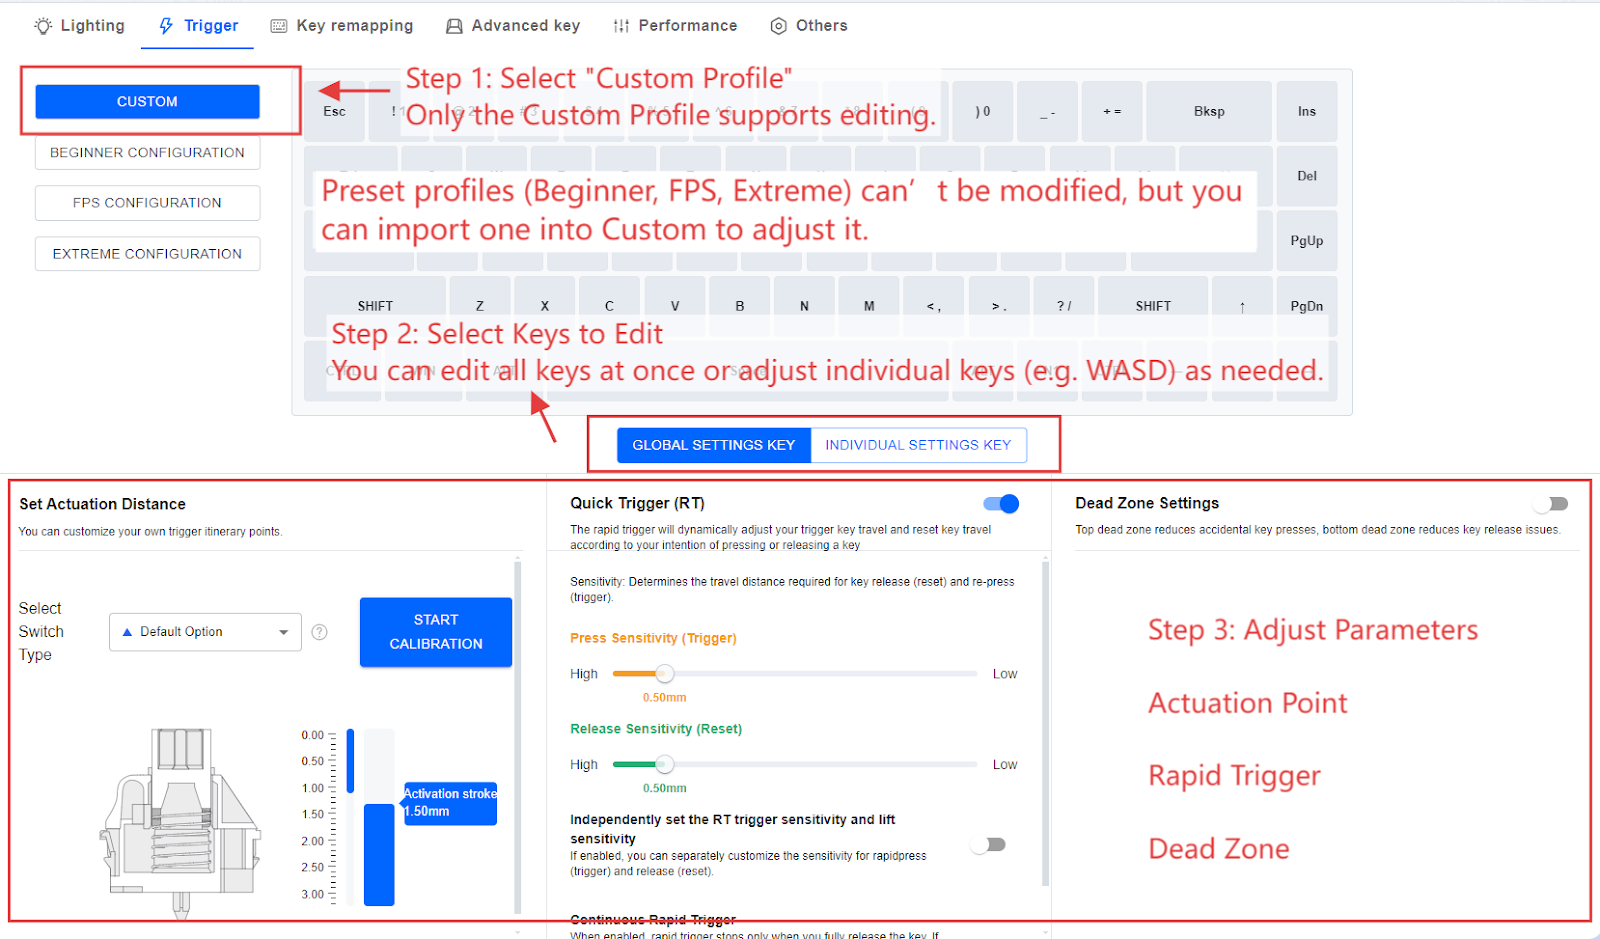
Preset & Custom Profiles
Comes with 3 built-in profiles:
- Beginner Configuration – Balanced and easy to control
- FPS Configuration – Prioritizes rapid deactivation
- Extreme Configuration – Max performance with minimal key travel
Custom profiles allow you to set different actuation points for specific keys (e.g. WASD for gaming)
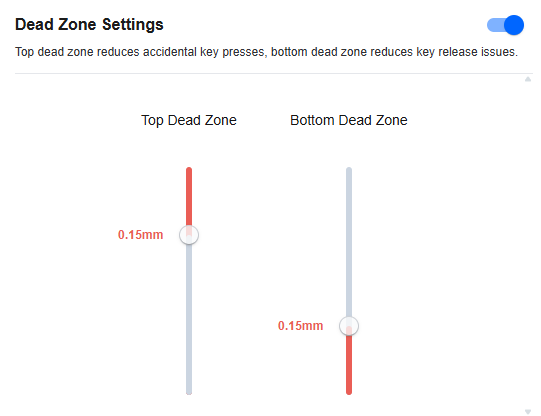
Dead Zone Settings
How to Adjust Deadzone Parameters
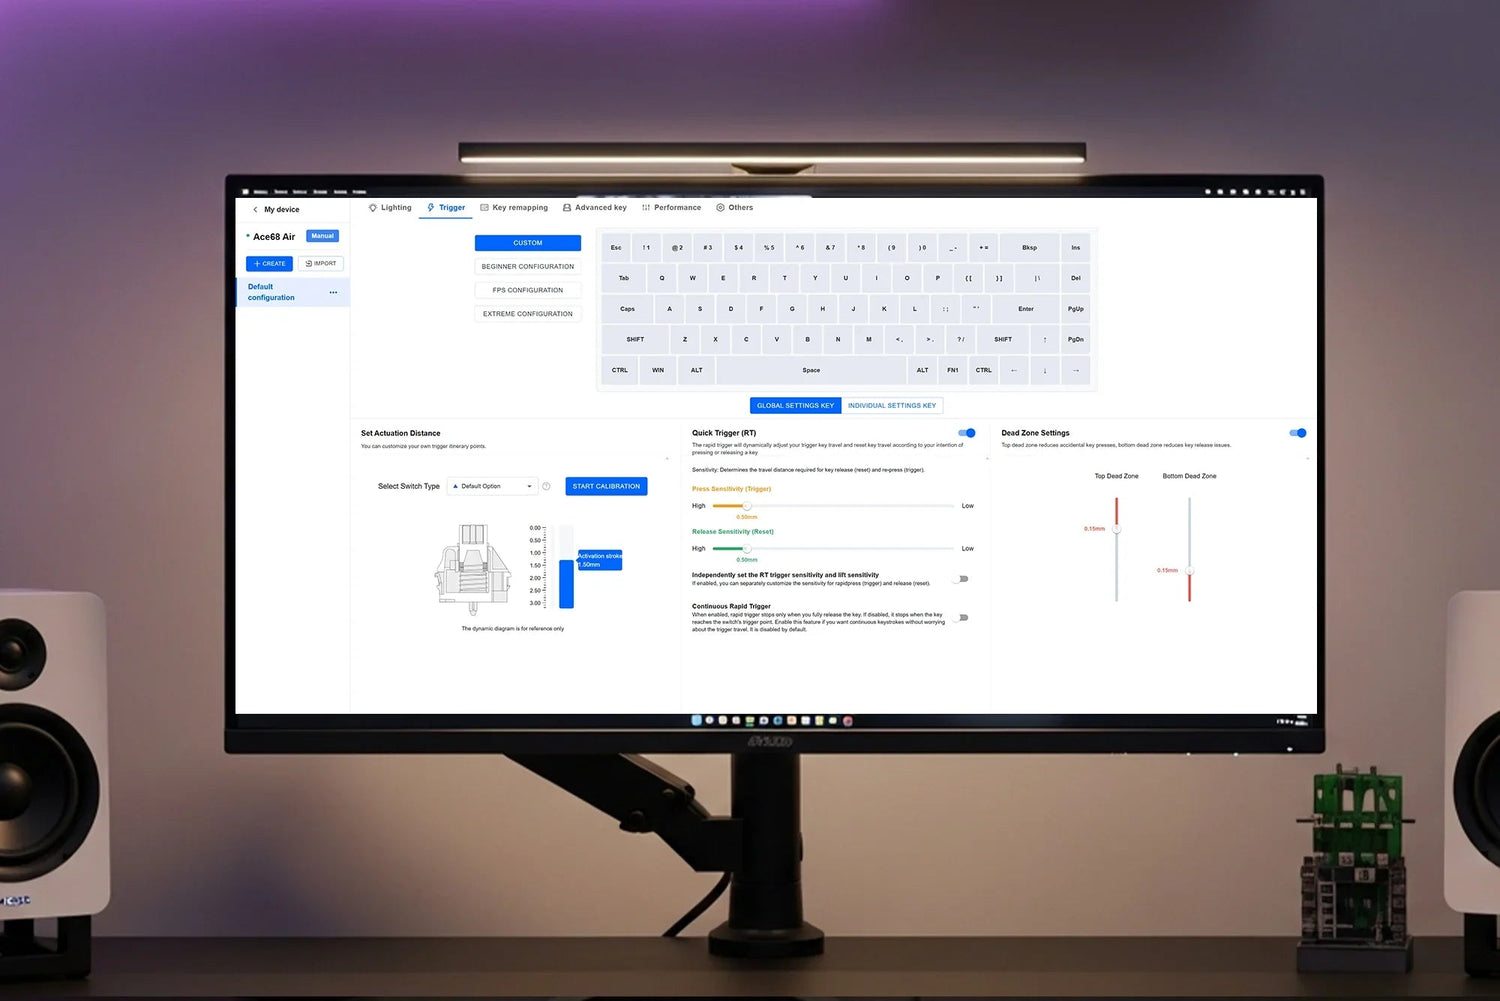
Access the Trigger Settings Page
Open the driver software and go to the Trigger Settings page—this is required to adjust dead zone parameters.
Select a Custom Profile
Only the Custom Configuration allows you to modify dead zone settings. Default presets like Beginner, FPS configuration, or Extreme do not allow changes.
Adjust Deadzone Ranges
- Top Deadzone (Prevent Mistouch): Recommended to keep the default value of 0.00mm
- Bottom Deadzone (Prevent Unintended Release): Recommended to set to 0.05mm. You can adjust using the slider.
Optimization Tips
If Rapid Trigger (RT) sensitivity is set below 0.04mm, it’s advised to also set a bottom dead zone to prevent unintended key behavior.
For extreme settings, enable Stability Mode to improve key response consistency.

Calibration
After changes, it’s recommended to manually calibrate:
- Either hold Fn + Space for 5 seconds to reset,
- Or use the calibration button in the software.

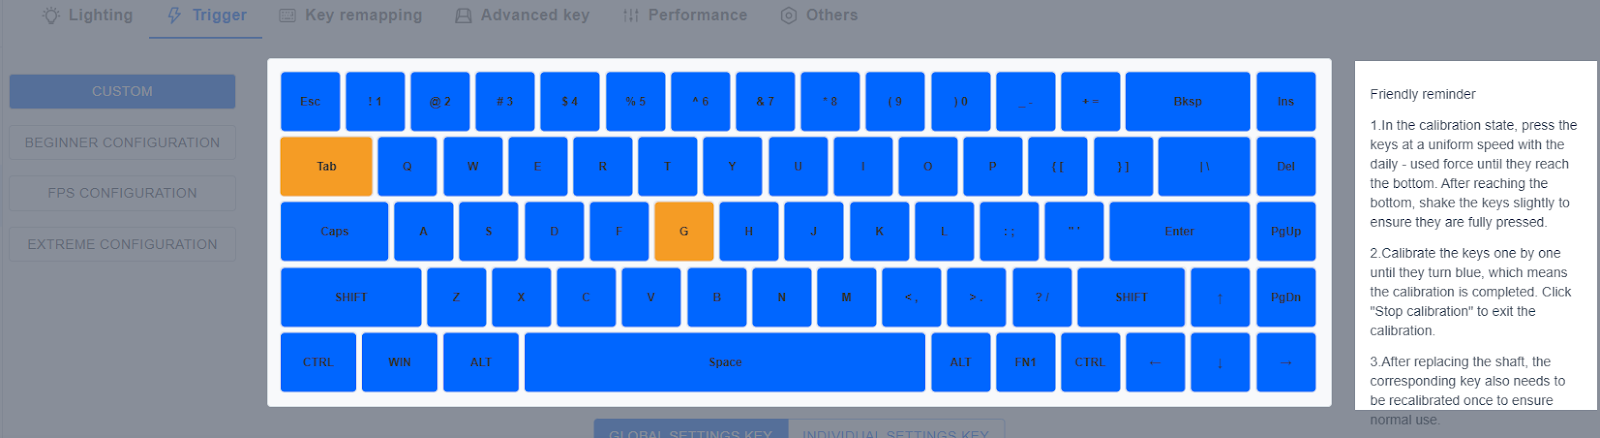
When calibration is complete, key LEDs should show a solid blue light. Click stop calibration.
LED Status Reference:
- Orange: Indicates that the key has not been calibrated successfully. The key trigger has been detected and needs to be pressed again until the calibration is successful.
- Gray: Indicates that the key trigger has not been detected and needs to be pressed multiple times until the calibration is successful.
- Blue: Indicates that the key has been calibrated successfully.
Explore More:
→ Master Advanced Key Settings
→ Customize Key Mapping and Macros
→ Optimize Performance & Firmware Settings
